
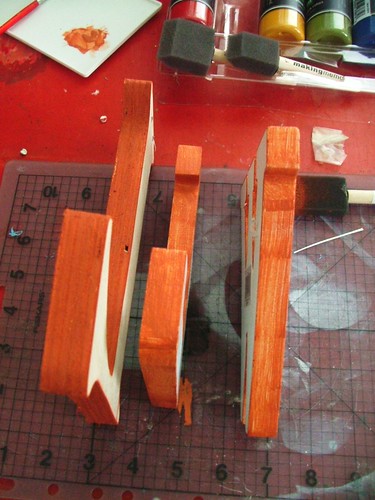
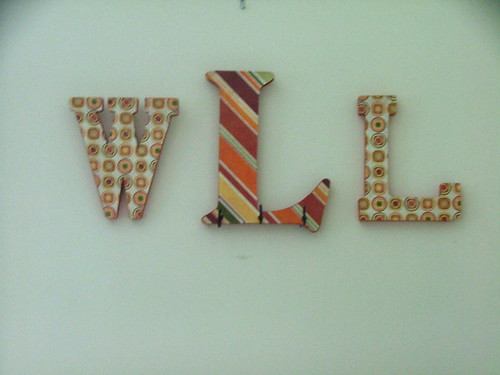
Here are 3 wooden letters I bought at Jo-Ann's a few weeks ago. These are our initials, the "W" and one "L" are smaller than our last name initial.

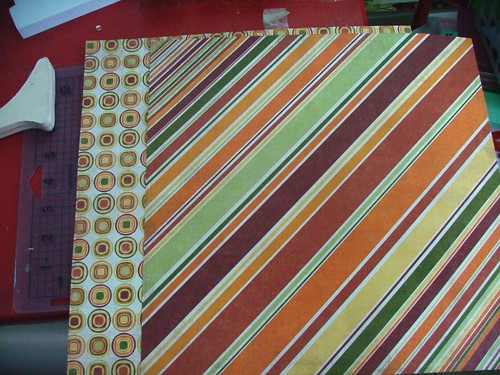
I picked out a couple of pieces of scrapbook paper I liked that had an Autumn feeling to them and then chose the paint color. I only painted the edges of the letters because that is all that shows and I am lazy. See my post from earlier today. L-A-Z-Y. I picked a nice pumpkin color to paint the edges.

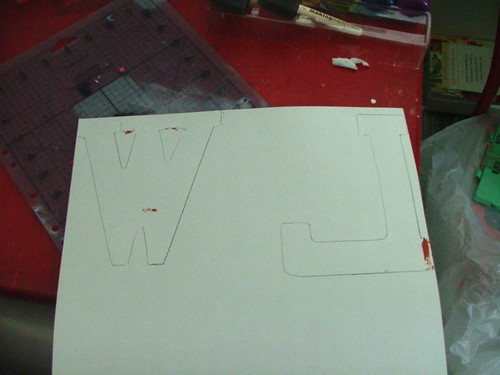
After the paint had dried, I turned the scrapbook paper right side down, turned the letters over so the right side was down, and I traced around them. The "W" was a pain to try and trace out!! As you can see from the paper, I guess some of the paint wasn't dry after all! Oh well.
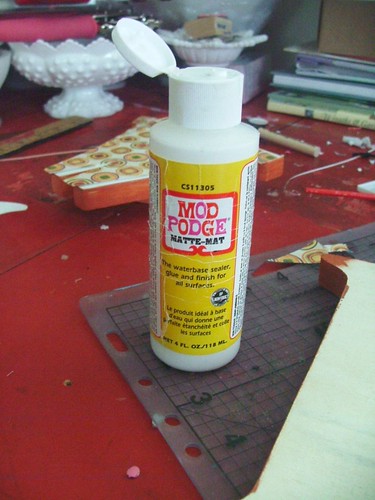
After cutting out the letters, I used Mod-Podge to glue the paper onto the wood. I used a very thin coat for the smaller two letters since those were primed white when I bought them but the unfinished large "L" soaked up quite a bit of the glue so I had to use more on that one.
After the glue had set up a bit and the paper was firmly attached, I used an Xacto knife blade to trim any little pieces of paper that wasn't aligned perfectly. Then I used a small emery board to sand down any snags along the edges. I then flipped the letters over and attached small sawtooth picture hangers on the back. I forgot to take a picture of that step!
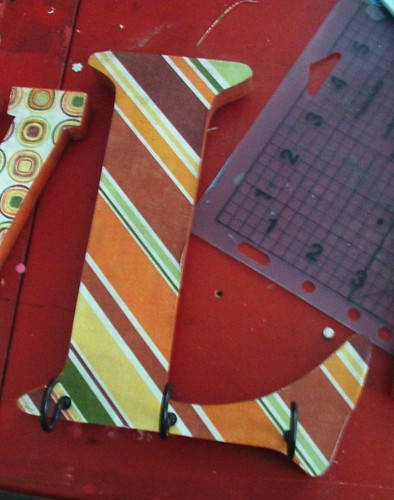
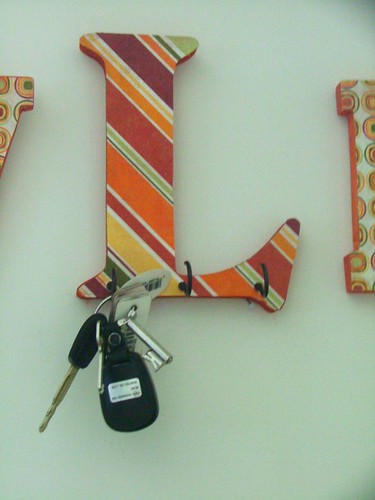
Next I added some bronze cup hooks onto the front of the large "L". I should've measured first and pre-drilled the holes but I was lazy. lol I just eyeballed it and hoped for the best.
Ta-Da...the finished product. I may have the husband rehang these later. I couldn't really reach the wall to hang these where I wanted them but I think they look okay for now. And we can hang our keys up again and stop throwing them onto my very old Louis Vuitton trunk!
3 comments:
I love your project! It turned out really beautiful! Great job! Have a great rest of the night! :)
What a super cute idea! Your letters turned out great! Enjoyed browsing over your treasures you found at the thrift store...especially the punch bowl! I read through your other blog too! Trying to get caught up on your trip adventures! That was the neatest thing to do! Sounds like you had a great trip! :) ~Rhonda
It turned out super cute!
Post a Comment